Are you ready to create stunning, movie-quality videos using just AI tools and your imagination? Today, I’ll walk you through, step by step, how you can turn simple ideas into beautiful films—complete with scenes, dialogue, moving lips, and even the ability to publish and earn on YouTube.
This detailed tutorial will cover everything, from how to write your story and generate images for scenes, to lip syncing your characters and pulling it all together with great voiceovers and easy editing. Let’s jump in!
Table of Contents
Introduction: The Power of AI Movie Creation
Have you ever dreamed of bringing your stories to life but thought you needed expensive equipment, special skills, or a whole team? Not anymore! With modern AI tools, anybody—even if you’re a total beginner—can turn still images into vibrant, animated stories and movies. You don’t need to be a pro to make things that look amazing and feel engaging.
“With this tutorial, you will be able to create anything you can imagine and even earn money from YouTube.”
Step 1: It All Starts With a Great Script
Every great movie starts with a story. Even the best visuals need a good script to keep viewers hooked. Here’s how to get started:
Using ChatGPT for Instant Movie Scripts
We’ll use ChatGPT because it can help you brainstorm, outline, and generate a script in seconds.
Here’s how:
- Open up ChatGPT (use the free version or any AI chat tool you like).
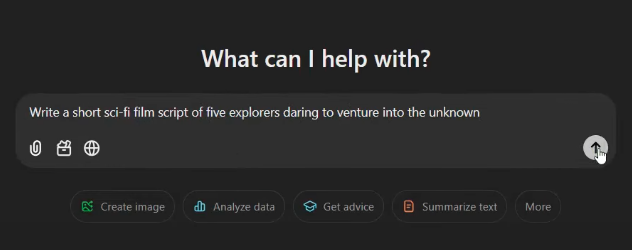
- Prompt :
Write a short sci-fi film script about [your idea here].
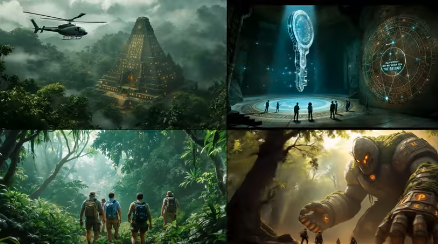
For example :Write a short sci-fi film script about explorers trying to find a lost city in the jungle. - Hit send and watch ChatGPT do its magic. In seconds, you’ll have a script divided into scenes, with characters and dialogue.
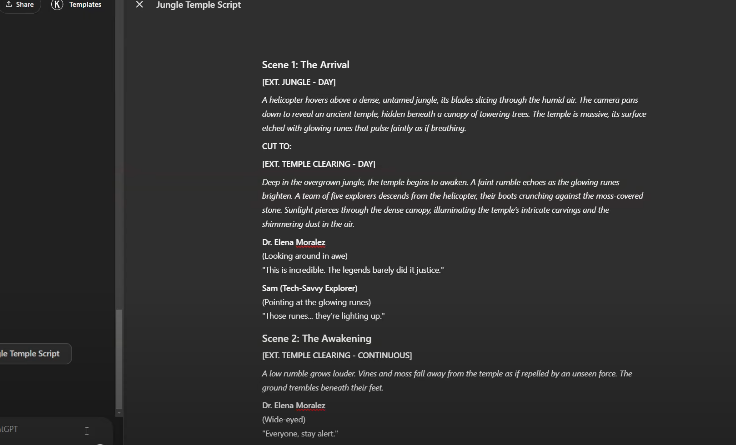
A screenshot of ChatGPT generating a movie script
Why Not Text to Video?
Trying to go directly from text to video with AI can be unpredictable. The result often looks messy or off-topic. That’s why we use a multi-step approach: First, create great scenes as images, then transform those images into moving, talking video clips!
Step 2: From Text to Incredible Images
Tools for Creating Images From Prompts
Next, let’s turn your movie scenes into stunning visuals—one shot at a time.
We recommend Leonardo AI (it’s fast, easy, and generates high quality images). Other great options include Flux and PICK Lumen. Most work similarly.
Get Scene Prompts Fast With ChatGPT
- Go back to your ChatGPT script.
- Ask :
Give me the image prompts for each scene. - Result : You’ll get a list of summarized prompts for each shot.
Pro tip:
If a scene prompt actually covers two different moments (like a helicopter hovering and people climbing out), just break it into two prompts.
Generating Images in Leonardo AI
- Copy your prompt (e.g., “A helicopter hovering above a dense jungle at sunset”).
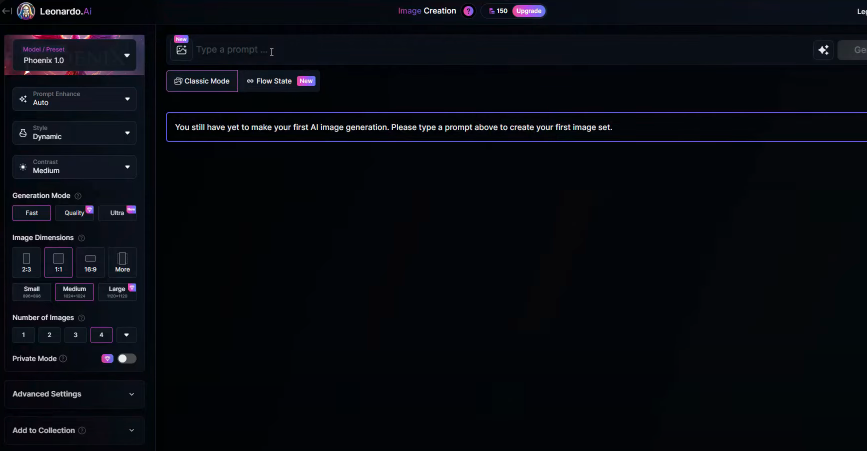
- Open Leonardo AI.
- Paste your prompt into the image creation box.
- Select Flux model from the presets.
- Set image dimensions (16×9 is perfect for video).
- Choose number of images to generate (start with 4).
- Click Generate.
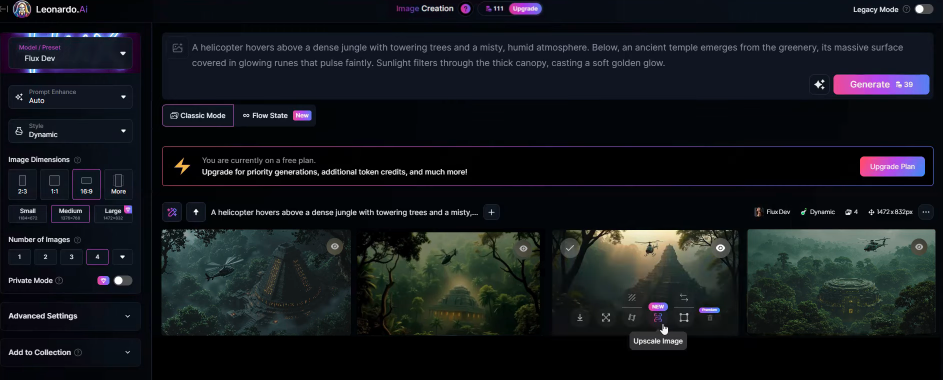
Within seconds, you’ll see four stunning options! Pick your favorite, upscale if needed, and download.
Tips for Image Generation
- If a shot has both action and detail, split into two prompts for clarity.
- Download 2 of your favorite images per prompt, so you have options during video creation.
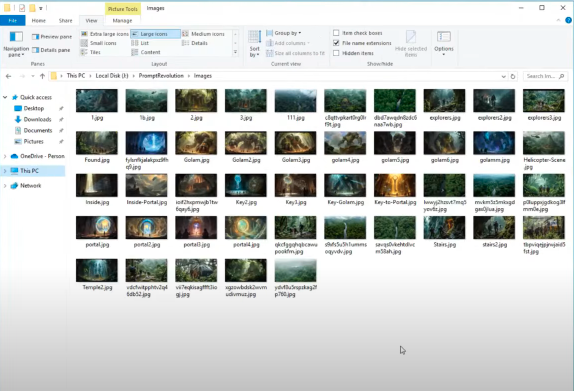
By now, you’ll have a folder full of beautiful, movie-like images—one for every scene.
Step 3: Turning Images Into Videos
You have your images—now let’s bring them to life!
The Best AI Tool for Image to Video
We’ll use Hailuo AI (also called Minimax), a user-friendly AI tool for animating images and creating short videos from stills.
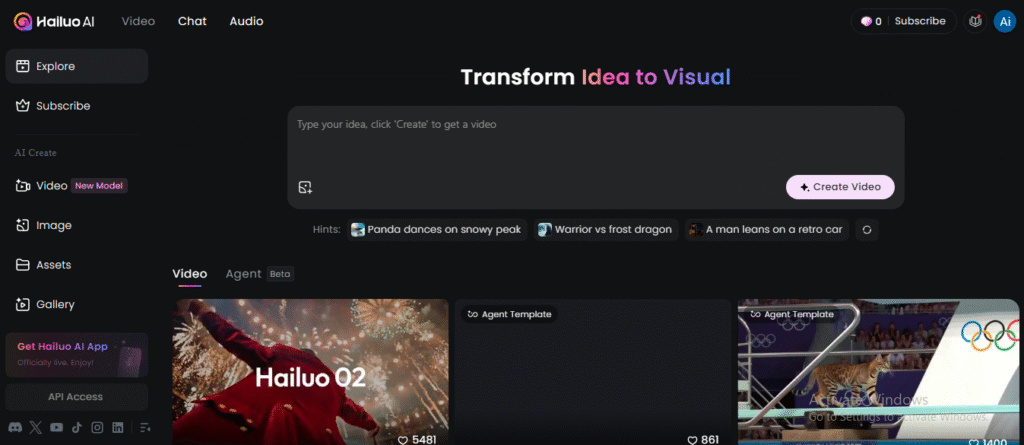
To get started:
- Visit Hailuo AI
- Go to the Create section
- Select the Image to Video tab
- Upload your first image
Adding Motion
In the prompt box, describe the basic movement you want (like “slow zoom in on the explorers as they descend from the helicopter”).
For more natural motion, make sure to turn on the prompt enhancement feature—this is crucial for realistic, not jittery, motion.
Choose the “Base Image to Video” model and hit Generate!
- Repeat for your second version of the image (if you downloaded two alternatives)
- Check the results and pick your favorite for each shot
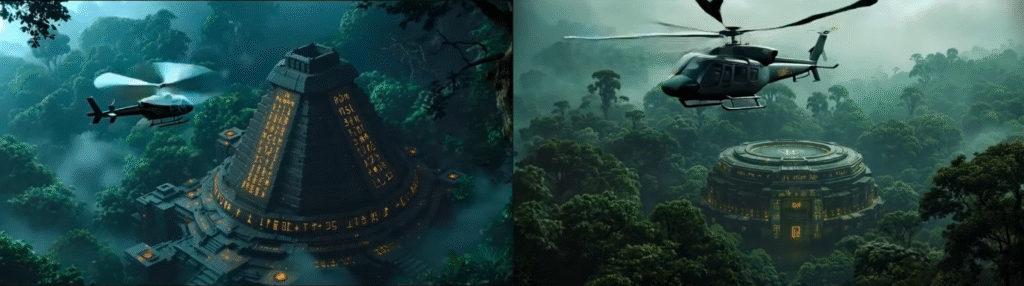
Comparison of two animated video clips from the same image prompt
Tip:
Repeat for all your images. In just a few minutes, you’ll have a series of short video clips, ready for audio and effects.
Step 4: Adding Dialogues and Narration
No movie is complete without voices and narration! Here’s how to layer on voiceovers—without ever needing a microphone.
Generating Dialogue With ElevenLabs
ElevenLabs offers realistic text-to-speech in dozens of voice styles and accents. Here’s how to use it:
- Sign up for a free account
- Select Text to Speech in the dashboard
- Browse the available voices by clicking on samples. Find one that fits your character or scene.
- Enter your dialogue (copy from your movie script).
- Click Generate Speech.
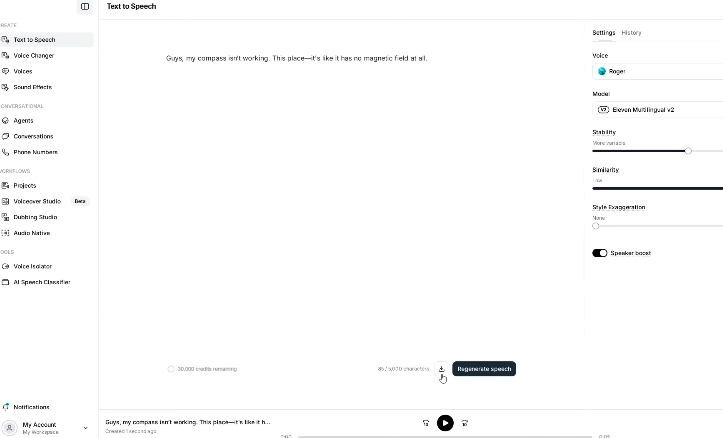
You’ll have a high-quality voiceover in seconds! Download the audio file for later.
Example
“Guys, my compass isn’t working. This place… it’s like it has no magnetic field at all!”
Repeat for every line of dialogue for your movie. For variety, use different voices for different characters!
Crafting Engaging Narration
For narration (the “voice of God” storytelling over your images), Hailuo AI’s built-in text-to-speech is excellent:
- Go to the Audio tab in Hailuo AI
- Click Switch Voice to listen to samples and select your favorite
- Pick an emotion for the narration (calm, dramatic, etc.)
- Adjust speed, pitch, and volume for perfect tone
- Paste your narration text and click Generate Speech
- Download the finished audio
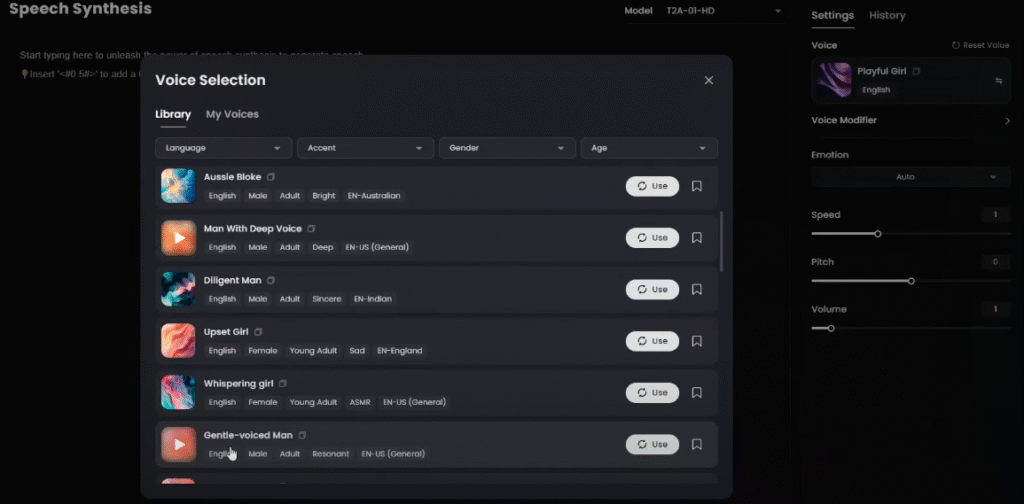
You can even clone your own voice or pick from a wide voice library. The results are natural, expressive, and perfect for storytelling.
Step 5: Lip Syncing: Making Characters Truly Speak
To really bring your movie to life, make sure your character’s mouths move in sync with their lines! Here’s how:
Why Is Lip Syncing So Important?
Imagine a character standing still while audio dialogue plays—it looks odd. Lip syncing aligns the movement of lips with the spoken words, making everything feel natural and immersive.
AI Tools For Auto Lip Sync
There are two easy online options (if you don’t want to dig into coding):
- Magic Hour (Recommended)
- Lalamu Studio (currently unavailable—Magic Hour is a great backup!)
Using Magic Hour for Lip Sync
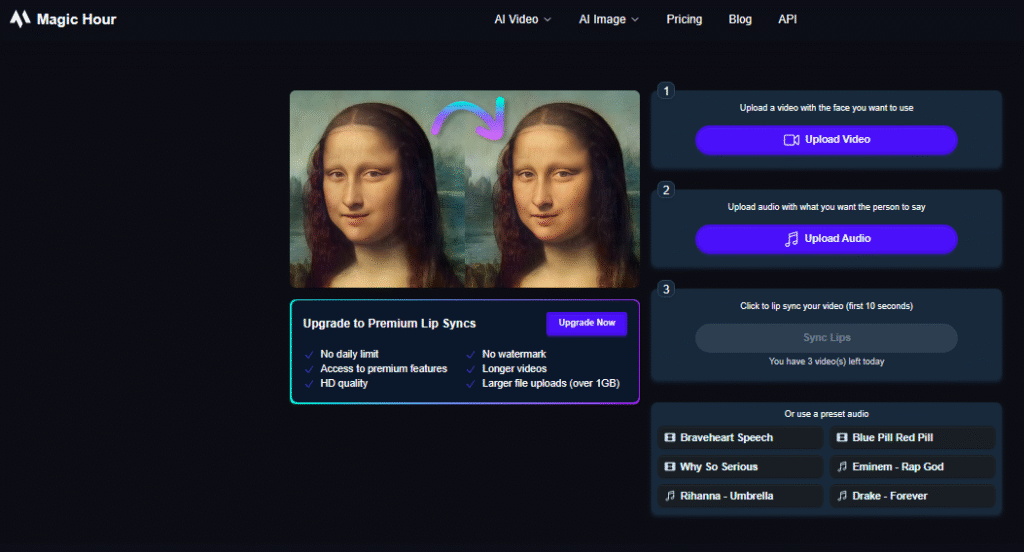
- Go to Magic Hour
- Go Down and Select > Lip Sync
- Sign up / Log in for faster processing
- Upload your video file (the animated image from Hailuo AI)
- Go to Advanced settings to trim or align start/end times if needed
- Upload your audio (the line created in ElevenLabs)
- Click Render Video
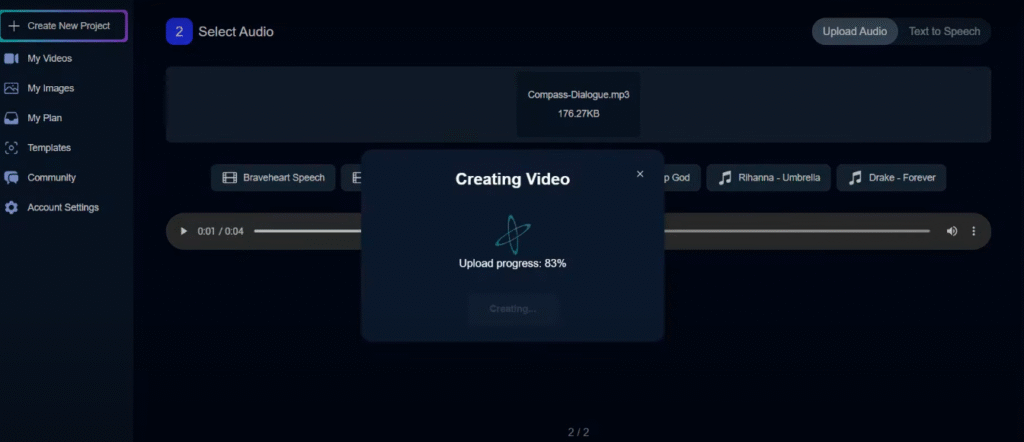
In moments, the system analyzes both tracks and animates the lips to perfectly match the dialogue.
Play your new video. The lips now move just like a real actor!
Download the synced video for your movie. Repeat the process for every scene.
Other Lip Syncing Tools
- Wave2Lip: An open source, code-based option running on Google Colab.
(Links will be posted at the end!)
Step 6: Pulling It All Together With Editing
Now, you’ve got everything—the scenes (as AI-generated animated video clips), the voice lines, and the narration. Time for final editing!
Fast, Free Editing With ClipChamp
Clipchamp is a free, browser-based video editor that’s easy for beginners but powerful enough for full projects.

The Process
- Go to Clipchamp and sign up
- Create a new video project
- Import all your materials (the video clips and audio files)
- Drag video clips onto the timeline and arrange them in correct story order
- Trim clips as needed for pacing
- Import your dialogue and narration
Drag onto the audio layers of the timeline, matching each to the right video clip. - Add effects, transitions, or background music for extra polish (optional)
- Export your completed movie, ready for YouTube or anywhere else
Pro Tips
- Add subtitles or text overlays for key moments
- Use fade-ins and transitions for smooth scene changes
- Adjust audio levels so dialogue is always clear
Tips, Resources, and Extra Tools
Here’s a handy reference for all the tools and resources mentioned:
- Scriptwriting: ChatGPT
- Image Generation: Leonardo AI, PICK Lomen
- Image to Video: Hailuo AI (Minimax)
- Dialogue & Voiceover: ElevenLabs, [Hailuo AI Audio], [Voice Cloning Options]
- Lip Sync: Magic Hour, Wave2Lip (Colab)
- Editing: Clipchamp, Capcut (great alternative)
Keep all your files organized in folders by scene for easy importing.
Bringing It All Together: Workflow Checklist
Here’s a sample checklist you can follow for your AI-powered movie project:
- Write your script in ChatGPT
- Break script into scene prompts
- Generate images for each scene with Leonardo AI
- Animate each image with Hailuo AI
- Create dialogue audio for each line with ElevenLabs
- Produce narration with Hailuo AI (or ElevenLabs)
- Use Magic Hour to lip sync dialogue audio to each video
- Pull all clips and audio into ClipChamp for final editing
- Export and publish your movie!
Final Thoughts and Next Steps
You’ve reached the end of this in-depth tutorial, and you now have a powerful new skill: making movies with nothing but your ideas, a computer, and free or affordable AI tools. Whether you want to make short films for fun, tell your stories online, or even monetize your movies on platforms like YouTube, you now know every step.
“You can create anything you can imagine—and share it with the world.”
Don’t be afraid to experiment! The more you play with prompts, tools, and creative ideas, the better your movies will get. Share your creations with friends, on social media, or even start a YouTube channel.
Have questions? Want more guides?
Leave comments below, and don’t forget to check back for guides on advanced effects, character design, or turning your AI movie into a full YouTube series!
Useful Links
- Leonardo AI: https://leonardo.ai/
- Hailuo AI (Minimax): https://haloai.videoo/
- ElevenLabs: https://elevenlabs.io/
- Magic Hour: https://magic-hour.ai/
- Clipchamp: https://clipchamp.com/
- Wave2Lip (GitHub): https://github.com/Wav2Lip
- ChatGPT: https://chat.openai.com/
Thank you for reading! If you’re excited to see more guides like this, share with a friend, and subscribe for updates. Happy movie making!